Table of Contents
- 1. Attic Insulation: The Foundation of HVAC Efficiency
- 2. Wall Cavity Insulation for Complete Thermal Coverage
- 3. Basement and Crawlspace Insulation to Seal Air Leaks
- 4. Ductwork Insulation to Prevent Conditioned Air Loss
- 5. Pipe Insulation to Protect Hot Water Lines
- 6. Air Sealing Before Insulation Installation for Maximum Results
- 7. Professional Energy Assessment to Identify Your Specific Needs
- Frequently Asked Questions (FAQ)
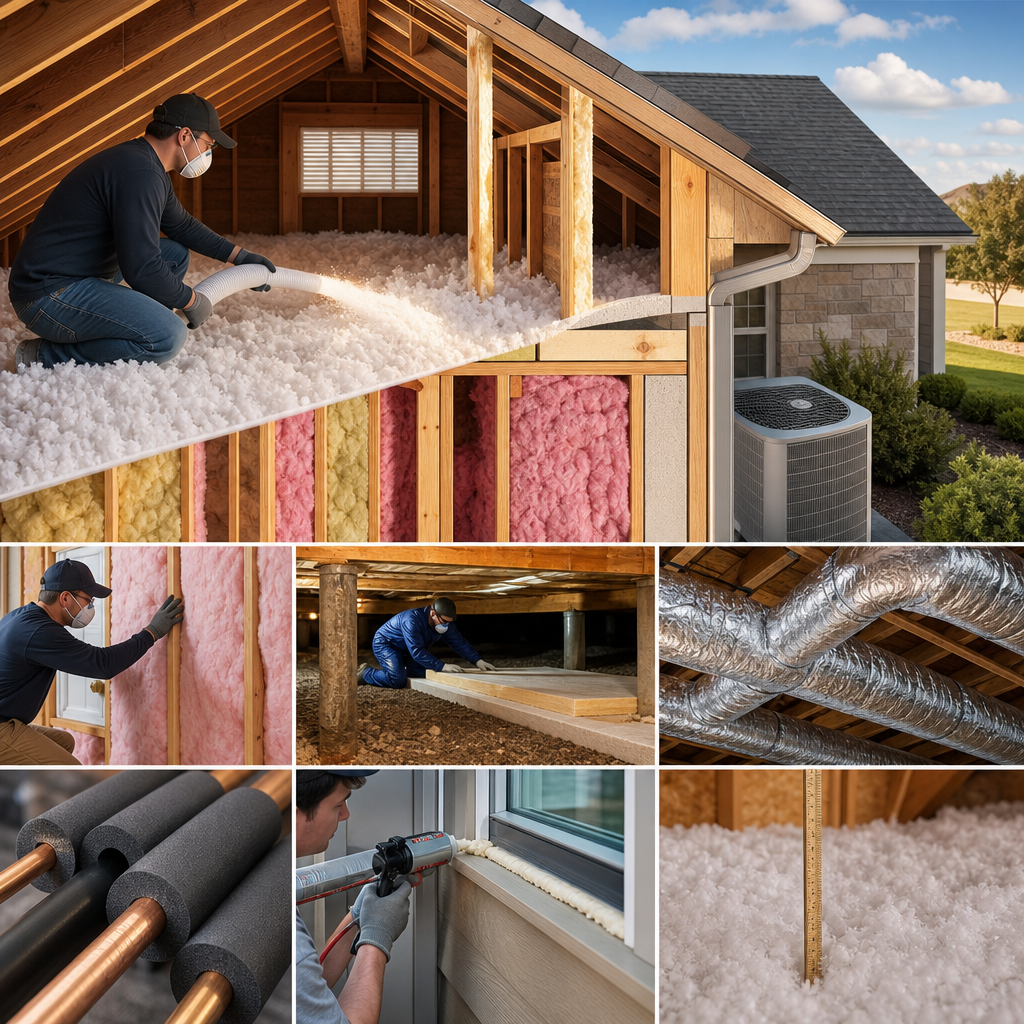
1. Attic Insulation: The Foundation of HVAC Efficiency
Your attic is where most homes lose conditioned air. Heat rises in winter and radiates down from your roof in summer, making this space the single most important zone to insulate well. We recommend checking your current R-value (a measure of insulation resistance). Most Austin and San Antonio homes built before 2000 have inadequate attic coverage, typically R-19 to R-30 when current best practices call for R-38 to R-49.
When attic insulation is insufficient, your HVAC system compensates by running longer cycles. In summer, cool air escapes upward. In winter, heat loss forces your furnace to kick in more frequently. This constant cycling reduces efficiency and stresses components.
We typically recommend blown-in cellulose or fiberglass insulation for attic retrofits because it conforms to existing framing, seals gaps, and installs quickly without major disruption. The investment pays back in reduced energy costs within 3-5 years for most homes.
What to do next: Schedule a free attic insulation assessment. We’ll measure current R-value, identify air leaks, and show you exactly where energy escapes. Homeowners also often qualify for Texas attic insulation rebates in 2026 that offset upgrade costs significantly.
2. Wall Cavity Insulation for Complete Thermal Coverage
Walls are the next critical layer. Existing homes often have little to no insulation in wall cavities, particularly in older construction. While adding insulation to finished walls is more invasive than attic work, it’s worth considering if you’re planning renovations or if entire wall sections are uninsulated.
Open-cell or closed-cell spray foam insulation works best for wall cavities because it fills irregular spaces, seals air leaks simultaneously, and provides higher R-values per inch. Unlike fiberglass batts, which require perfect installation to be effective, spray foam adapts to framing inconsistencies and blocks air movement completely.
The thermal benefit is significant: walls without insulation allow outside temperatures to radiate directly into your conditioned space. In Texas summer heat, uninsulated exterior walls become radiators pushing heat into your home. Insulated walls create a consistent thermal barrier, reducing the temperature differential your HVAC system must overcome.
Practical takeaway: If your home is 30+ years old and you’re considering exterior work, siding replacement, or any wall opening, insulation should be part of that project. The cost is lower when walls are already open, and the efficiency gain compounds over decades of ownership.
3. Basement and Crawlspace Insulation to Seal Air Leaks
Many homeowners overlook basements and crawlspaces, but these areas are major sources of energy loss and air infiltration. Cold air from crawlspaces rises into living areas, forcing your HVAC system to reheat it. In poorly sealed basements, similar dynamics create drafts and temperature inconsistency.
Proper basement insulation typically involves insulating rim joists (the band board connecting foundation to framing), sealing rim joist penetrations, and insulating basement walls from interior or exterior. Crawlspaces benefit from encapsulation and insulation of band boxes, plus sealed foundation vents to prevent unconditioned outdoor air from entering.
The connection to HVAC performance is direct: if cold air leaks into the lowest part of your home, your heating system must work harder to maintain living area temperatures. This is especially problematic in winter or during cool months when crawlspace temperatures drop significantly below your set point.
Action step: Have us inspect your crawlspace or basement during a professional energy assessment. Sealing these areas often costs less than other upgrades but delivers outsized efficiency improvements because air leaks are the easiest heat loss to quantify and fix.
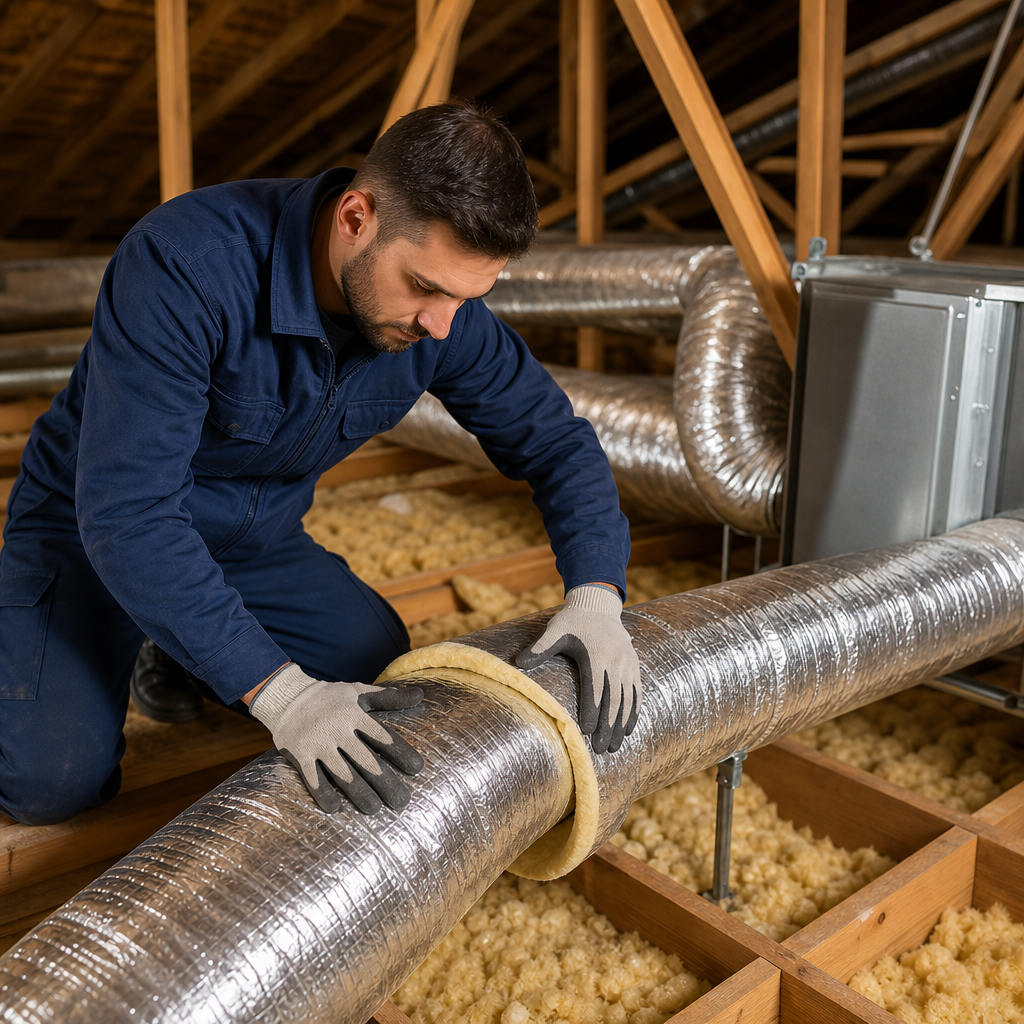
4. Ductwork Insulation to Prevent Conditioned Air Loss
This is where many homeowners are surprised: your air ducts can lose 20-30% of conditioned air before it reaches your living spaces, especially if ducts run through unconditioned areas like attics or crawlspaces.
Uninsulated ductwork in hot attics means winter heat loss and summer cooling loss as air travels long distances from your furnace or air handler. Insulated ducts maintain air temperature throughout the system, reducing the load on your HVAC equipment. We recommend 1-2 inches of foam or fiberglass insulation around all ducts in unconditioned spaces.
Beyond insulation, duct sealing is equally important. Leaky ducts lose more air than poorly insulated ones. We often combine HVAC duct sealing with insulation work because both address the same problem: conditioned air reaching your intended destination efficiently.
Key benefit: Insulated and sealed ducts mean your HVAC system doesn’t need to overcompensate for losses. Rooms reach desired temperatures faster, and your system runs fewer cycles, extending equipment life significantly.
5. Pipe Insulation to Protect Hot Water Lines
Hot water pipes running through uninsulated areas waste heat continuously. Pipes in crawlspaces, attics, or unfinished basements lose temperature rapidly, forcing water heaters to reheat water constantly.
Foam pipe insulation is inexpensive and simple to install. Quarter-inch to 1-inch foam wrap around hot water lines prevents heat loss, stabilizes water temperature at fixtures, and reduces water heater runtime. While not directly part of your HVAC system, it reduces overall home energy consumption and improves comfort by delivering hotter water faster.
This upgrade complements insulation and air sealing work by addressing another source of thermal loss. Many homeowners don’t realize that uninsulated hot water lines force their water heaters to work harder, adding to overall home energy waste. When combined with the other insulation improvements in this guide, pipe insulation becomes part of your comprehensive efficiency strategy.
6. Air Sealing Before Insulation Installation for Maximum Results
Here’s what we tell homeowners: insulation is most effective when air doesn’t move around it. Air sealing must come first. Gaps, cracks, and penetrations allow air leakage that undermines even premium insulation.
Common air leak sources include:
- Rim joist connections (foundation to framing)
- Attic penetrations (wiring, pipes, ducts)
- Window and door frames
- Electrical outlets on exterior walls
- HVAC return air leaks
We use weatherstripping, caulk, spray foam, and duct sealant to address these before adding insulation. A blower door test (part of a professional energy assessment) pinpoints the biggest leaks so work is prioritized efficiently.
The reason this matters for HVAC: leaky ducts waste energy and degrade system performance. Sealing duct leaks before insulating ducts ensures maximum benefit from both upgrades.
Next step: Don’t insulate without sealing first. We’ll identify your primary air leak sources and seal them before recommending insulation additions.
7. Professional Energy Assessment to Identify Your Specific Needs
Every home is different. A 1960s ranch in Austin has different insulation needs than a 2015 colonial in San Antonio. A professional energy assessment cuts through guesswork and tells you exactly where to invest.
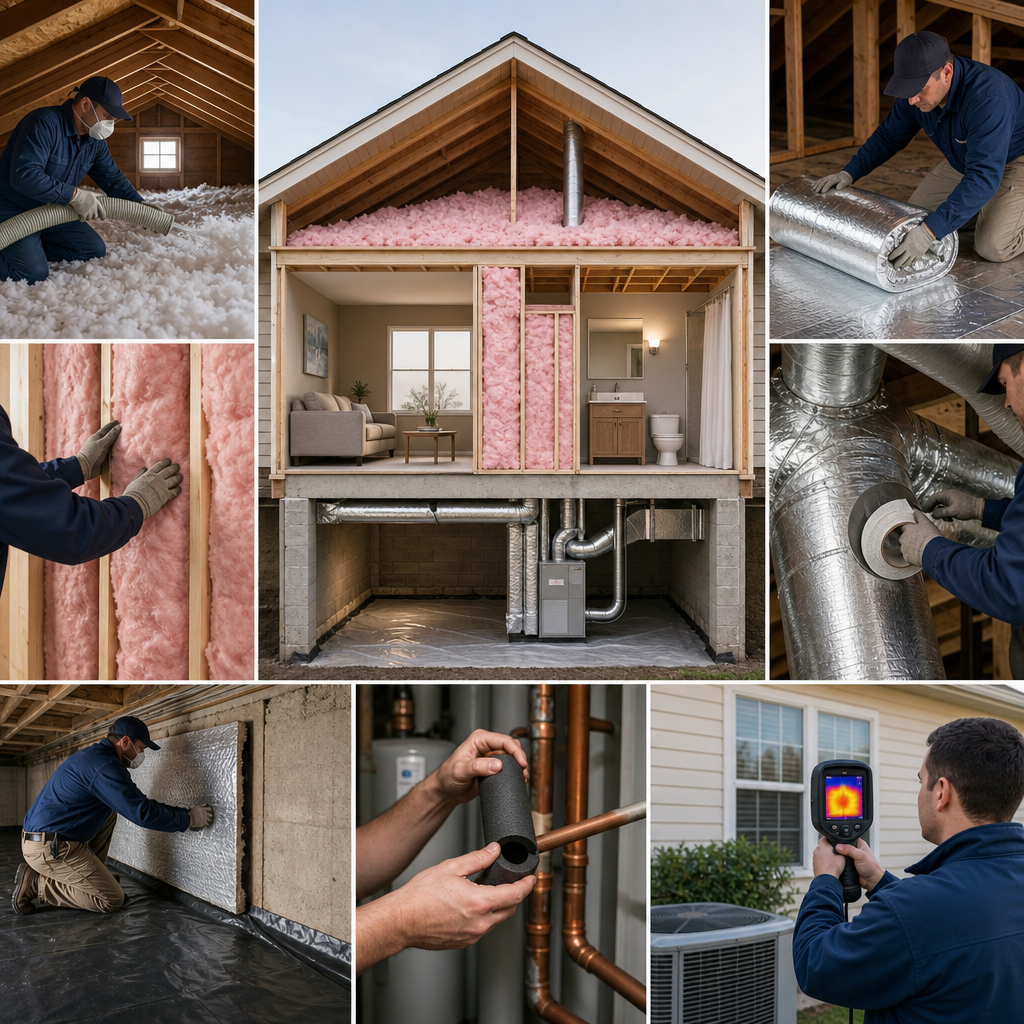
We use thermal imaging, blower door testing, and duct leakage diagnostics to map your home’s thermal weak points. This data-driven approach prioritizes work by impact and cost-effectiveness, ensuring your insulation budget delivers maximum efficiency gains.
The assessment typically reveals that one or two upgrades address 70% of your energy waste. For some homes, attic insulation and duct sealing solve the problem. For others, crawlspace encapsulation is the priority. Without an assessment, you’re essentially guessing.
We offer free service estimates that include a preliminary energy walkthrough. If you want comprehensive diagnostics, our full energy assessment identifies insulation gaps, air leaks, HVAC performance issues, and provides a prioritized upgrade plan with estimated savings and payback periods. Texas homeowners also often qualify for 2026 rebates and tax incentives that offset initial investment significantly.
Contact us for a free energy assessment and discover exactly where your home is losing efficiency. We’ll walk you through a prioritized plan, explain payback timelines, and handle the installation with the same professionalism you expect from a trusted local expert.
If you’re dealing with dust, poor airflow, mold in your ducts, or a clogged dryer vent — don’t wait. These issues can affect your health and safety. Go Air Ducts Group are the local experts in air duct cleaning, mold removal, dryer vent cleaning, and attic insulation. Call now for a free inspection and same-day service in Austin and San Antonio.
Frequently Asked Questions (FAQ)
How much can we help you save on energy bills through insulation upgrades?
We typically see our customers achieve energy savings of 15-30% after completing comprehensive insulation upgrades, though your specific savings depend on your home’s current condition and which areas we address. Our free energy assessment helps us identify where you’re losing the most conditioned air so we can prioritize upgrades that deliver the fastest return on your investment. In Texas’s climate, proper attic and ductwork insulation tends to provide the most dramatic improvements to both comfort and utility costs.
Why should we seal air leaks before adding new insulation?
Air sealing is critical because insulation works best when it can do its job without conditioned air escaping through gaps and cracks throughout your home. We’ve found that skipping this step means your HVAC system works much harder than necessary, forcing your utilities higher and wearing out equipment faster. We recommend our air sealing service first, then install insulation to create a complete thermal barrier that truly maximizes your system’s efficiency.
How long does a typical insulation upgrade project take?
Most of our insulation projects in Austin and San Antonio take 1-3 days depending on the scope, whether we’re working in attics, crawlspaces, or wrapping ductwork throughout your home. We’ll provide you with a specific timeline during our free estimate visit so you know exactly what to expect. Our crews work efficiently while maintaining the highest installation standards to ensure your upgrades perform as designed.