Table of Contents
- Why Texas Homeowners Face Mold Risk in Inadequate Insulation
- How Moisture Problems Lead to Mold Growth in Your Attic
- The Connection Between Poor Insulation and Indoor Air Quality
- Blow-In Insulation as Your First Line of Defense Against Mold
- Our Professional Installation Process for Maximum Mold Protection
- Combining Insulation Upgrades With Air Duct Cleaning for Complete Protection
- Signs Your Current Insulation Is Failing to Prevent Mold
- How We Assess Your Home’s Mold Risk Before Installation
- The Long-Term Benefits of Proper Blow-In Insulation
- Getting Your Free Insulation and Mold Prevention Estimate Today
- Frequently Asked Questions (FAQ)
Why Texas Homeowners Face Mold Risk in Inadequate Insulation
Texas homeowners often underestimate how much their insulation affects indoor air quality and mold risk. Inadequate or aging insulation doesn’t just waste energy and inflate utility bills—it creates the perfect conditions for moisture to accumulate in your attic, walls, and crawl spaces. Once moisture settles, mold grows fast, and the spores spread through your home via your HVAC system. We’ve inspected hundreds of Austin and San Antonio homes where homeowners discovered mold infestations only after noticing respiratory issues or visible discoloration in their attics.
The good news: proper blow-in insulation paired with strategic air duct maintenance stops mold problems before they start. This guide walks you through why mold thrives in inadequate insulation, how professional installation protects your home, and what steps you should take now to assess your mold risk.
Texas humidity is relentless. Even with air conditioning running, moisture gets trapped in attics and wall cavities when insulation fails to maintain proper temperature and humidity barriers. Older homes in Austin and San Antonio often have fiberglass batts that have settled over decades, leaving gaps where warm, moist air can pool. New construction sometimes skips adequate attic ventilation or uses insufficient R-values for our climate.
The problem compounds in summer. When your air-conditioned interior meets the blazing Texas heat outside, condensation forms on cooler surfaces inside your walls and attic. Without proper insulation thickness and air sealing, that moisture lingers. Mold spores (always present in air) land on this damp surface and colonize within 24 to 48 hours. We’ve found mold actively growing behind walls because homeowners didn’t realize their insulation had degraded or been improperly installed in the first place.
Inadequate insulation also forces your HVAC system to work harder, cycling more frequently and pulling humid air into return ducts. This humid air then travels through ductwork, depositing moisture in places you can’t see. The result: mold inside air ducts, reduced airflow, and contaminated indoor air quality across your entire home.
Action step: Schedule a free inspection to evaluate your current insulation’s R-value and coverage. We’ll check for signs of settling, moisture damage, and gaps that let humid air infiltrate your conditioned spaces.
How Moisture Problems Lead to Mold Growth in Your Attic
Moisture in your attic comes from three main sources: warm indoor air leaking upward through ceiling gaps, condensation from temperature swings, and inadequate ventilation. Once moisture reaches your attic, it has nowhere to go if your insulation traps it in place.
Here’s the mechanics: hot, humid air rises. If your insulation has gaps or has settled unevenly, that air escapes into the attic. When it hits cooler roof sheathing or metal nails, it condenses into water droplets. Attic temperatures in Texas swing dramatically between day and night, especially in spring and fall—perfect conditions for moisture to accumulate. Poor attic ventilation prevents this moisture from naturally drying out.
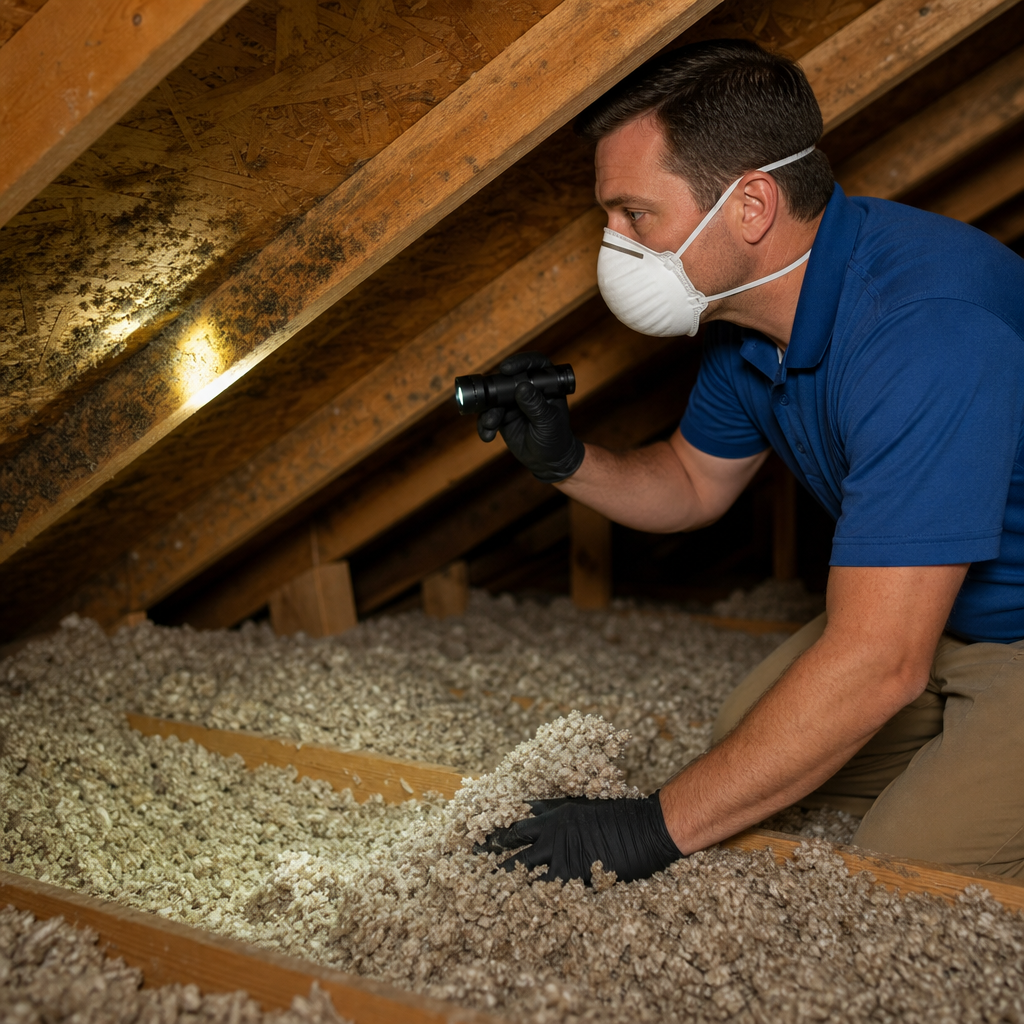
Within days, mold begins sprouting on wood framing, insulation itself, and roof sheathing. Black mold, which is toxic when inhaled in high concentrations, commonly appears on attic insulation in our region. We’ve photographed attics where mold covers 30 percent or more of the exposed insulation, releasing spores that drift down through ceiling cracks into living spaces.
The timeline varies. Some homes develop visible mold within months of insulation failure; others take a year or two. But the process starts immediately once moisture begins accumulating. The longer you wait to upgrade inadequate insulation, the higher your mold remediation costs become.
Action step: Check your attic for visible signs of moisture: dark staining on insulation, water marks on wood, or a musty odor. If you spot any, contact us for a professional assessment before the problem spreads.
The Connection Between Poor Insulation and Indoor Air Quality
Your insulation directly impacts the air you breathe every day. When insulation fails to seal your home’s envelope properly, humid outdoor air infiltrates your living spaces. This excess humidity creates a breeding ground for dust mites, mold spores, and mildew growth on walls and in ductwork. Even if mold hasn’t colonized your attic yet, the moisture it allows through degrades your indoor air quality.
Mold spores travel through your HVAC system’s return ducts. If your air ductwork has gaps or leaks, those spores get distributed to every room. People with allergies, asthma, or compromised immune systems suffer most, but even healthy homeowners report improved breathing and fewer sinus problems after we upgrade their insulation and clean their air ducts.
Poor insulation also allows temperature gradients to develop inside your home. Your bedroom feels stuffy while the living room feels drafty. Your HVAC system can’t maintain even humidity levels, so some rooms become damp while others feel dry. This inconsistency signals that humid air is leaking into walls and attics unchecked.
The solution isn’t just adding insulation—it’s creating an integrated air barrier that stops moisture infiltration and works in tandem with clean, properly sealed ductwork. We combine these services because they’re inseparable. Upgrade your insulation alone, and you’ll still pull contaminated air through old ducts. Clean your ducts but leave your insulation failing, and moisture will re-contaminate your system.
Action step: Consider whether your home has inconsistent temperatures or humidity between rooms. This is often the first sign that insulation upgrades are overdue.
Blow-In Insulation as Your First Line of Defense Against Mold
Blow-in insulation—typically cellulose or fiberglass—fills cavities completely, eliminating the settling and gaps that trap moisture. Unlike batts, which can compress or shift over time, blown-in insulation conforms to every corner, ceiling joist, and irregular cavity in your attic.
Cellulose blow-in insulation offers superior mold prevention compared to fiberglass because it’s treated with borate, a natural mineral that resists mold and pest colonization. Fiberglass, while effective, is less mold-resistant and can still support mold growth if moisture reaches it. For Texas homeowners concerned about mold, cellulose is our standard recommendation.
Proper blow-in installation means several things:
- Air sealing first: We seal gaps around electrical boxes, ductwork, and rim joists before blowing insulation. Unsealed gaps let humid air bypass the insulation layer.
- Correct R-value: Texas homes should have R-30 to R-60 in attics depending on location and age. We calculate the right depth for your specific needs.
- Adequate attic ventilation: We ensure soffit and ridge vents are clear so moisture can escape naturally.
- Even coverage: Blown-in insulation is distributed evenly across the entire attic floor, with no thin spots or settling over time.
Once installed, blow-in insulation creates a continuous thermal and moisture barrier that keeps warm, humid indoor air from escaping upward into your attic. Temperature differences across your ceiling decrease, so condensation doesn’t form on roof sheathing. The attic stays drier, and mold has nowhere to take hold.
Action step: Ask any insulation contractor whether they air seal before blowing insulation. If they skip this step, their work will fail to stop moisture infiltration.
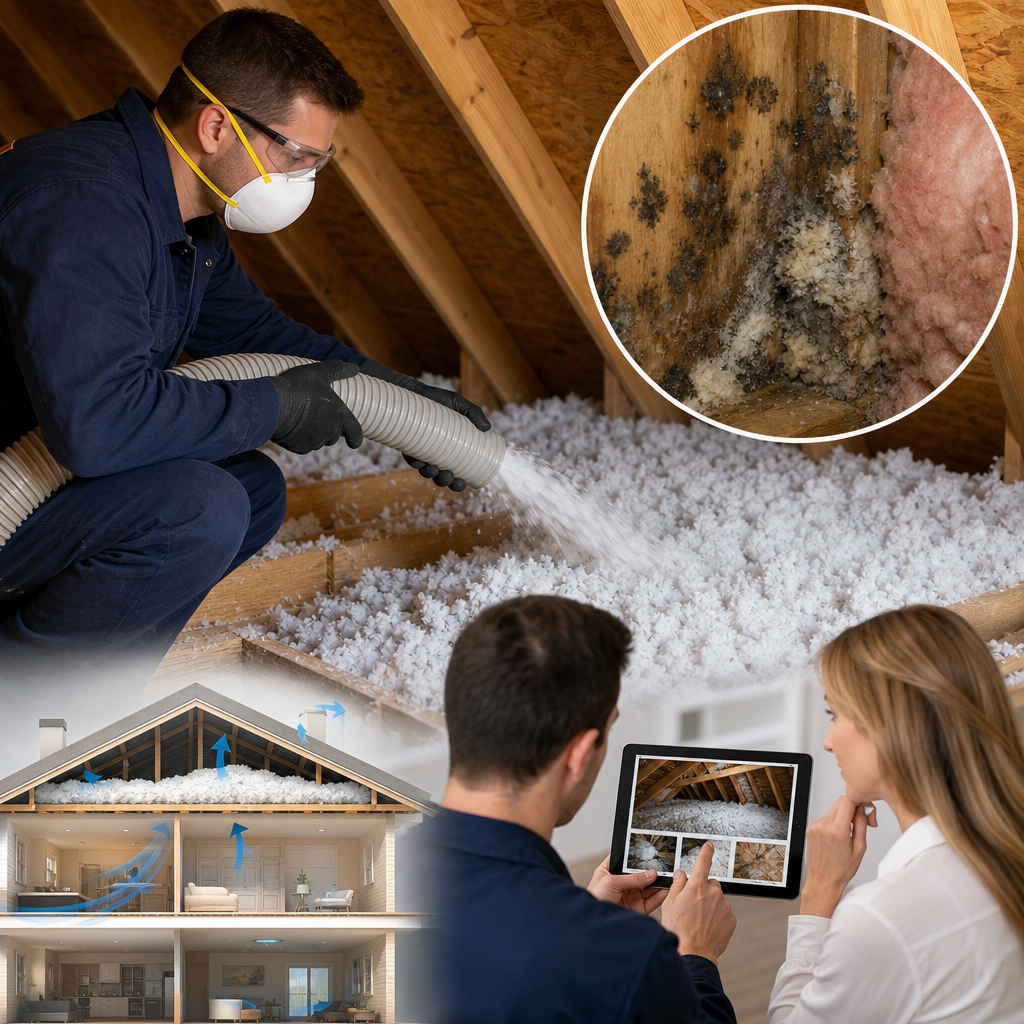
Our Professional Installation Process for Maximum Mold Protection
We approach every blow-in insulation project as a complete air sealing and moisture control job, not just a “stuff insulation in the attic” task. Here’s our process:
Step 1: Pre-installation inspection — We photograph your current attic condition, check for existing moisture or mold, measure R-value, and identify gaps and air leaks. We assess your attic ventilation and look for signs of past water damage or pest intrusion.
Step 2: Air sealing — We seal all gaps around electrical boxes, recessed lights, ductwork, plumbing penetrations, and rim joists using caulk and foam. We also seal around your attic access hatch. This step is critical and often skipped by inexperienced contractors.
Step 3: Attic ventilation check — We ensure soffit vents aren’t blocked by insulation and that ridge or gable vents are unobstructed. Proper ventilation allows moisture vapor to escape naturally, preventing buildup even if some humidity enters the attic.
Step 4: Insulation blowing — We blow cellulose to your target R-value, taking care to maintain consistent depth across the entire attic floor. We use borate-treated cellulose for mold resistance.
Step 5: Post-installation verification — We verify coverage, take photos, and explain the work to you. We provide documentation of R-value achieved and areas sealed.
Our certified HVAC technicians handle this work, not day laborers. We stand behind our installations with warranties that protect your mold prevention investment.
Action step: Request a detailed quote that breaks down air sealing, insulation type, R-value, and ventilation work. Vague quotes often mean shortcuts.
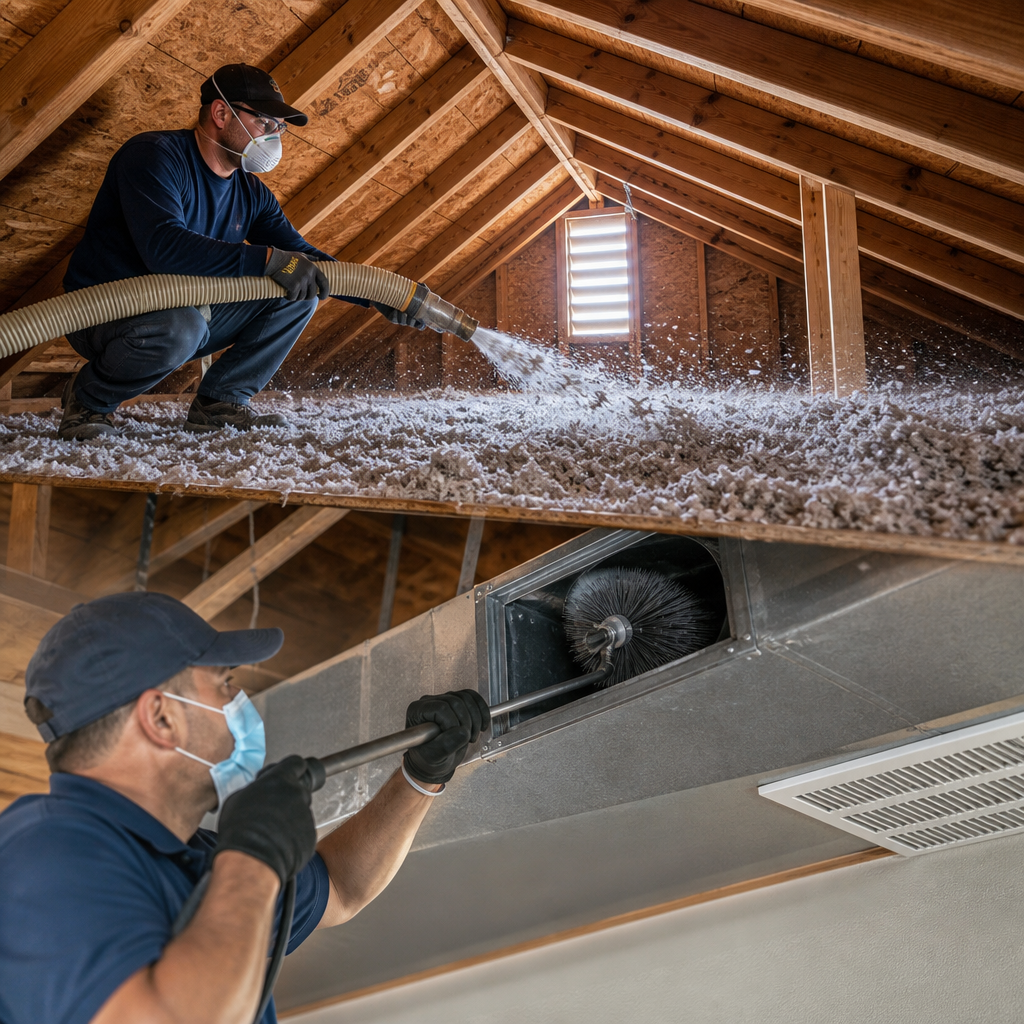
Combining Insulation Upgrades With Air Duct Cleaning for Complete Protection
Upgrading insulation stops mold from forming in your attic, but if your air ducts are already contaminated with mold spores, dust, and debris, you’ll continue breathing poor-quality air. That’s why we recommend combining air duct cleaning with insulation upgrades.
Here’s the sequence: First, we clean your air ducts to remove existing mold, dust, and allergens. Then we upgrade your insulation to prevent new moisture from reaching your attic and your HVAC system. Finally, we may seal ductwork gaps to ensure clean air doesn’t leak out and contaminated air doesn’t infiltrate your ducts from unconditioned spaces.
This integrated approach saves you money. Many homeowners spend $2,000 on duct cleaning and $3,000 on insulation separately, missing the compounding benefits of doing both. When bundled, we can offer better pricing and ensure the work is coordinated. You’ll see improvements in energy bills, indoor air quality, and allergy symptoms within weeks.
Homeowners often ask: “Should I clean ducts first or upgrade insulation first?” The answer depends on your situation. If your ducts show visible mold or you have respiratory issues, duct cleaning comes first for immediate relief. If your primary concern is future mold prevention and energy efficiency, starting with insulation makes sense. We’ll advise you based on your home’s specific condition.
Action step: If you haven’t had air ducts cleaned in over five years, schedule duct cleaning before or simultaneously with insulation work.
Signs Your Current Insulation Is Failing to Prevent Mold
Homeowners often don’t realize their insulation has failed until problems become obvious. Watch for these warning signs:
- High humidity levels: Your home feels sticky despite air conditioning running. Hygrometers (available at hardware stores for under $20) should read 30 to 50 percent humidity. Higher readings indicate moisture infiltration.
- Visible mold or dark spots in your attic, basement, or crawl space. Any visible mold warrants professional assessment.
- Musty odors in your attic, basement, or upper-floor closets. Musty smells indicate active mold growth or high moisture.
- Temperature inconsistency: Some rooms are always warmer or cooler than others, suggesting air leaks in your insulation envelope.
- Increased energy bills: Inadequate insulation forces your HVAC system to work harder. If your bills jump without explanation, poor insulation is often the culprit.
- Respiratory issues or worsening allergies that improve when you leave your home. Mold spores in your ducts affect indoor air quality noticeably.
- Frost or condensation on windows in winter, especially in upper-story rooms. This signals warm, moist air escaping upward.
Any combination of these signs suggests your insulation isn’t controlling moisture effectively. Don’t wait for visible mold to take action. Moisture problems escalate quickly in Texas.
Action step: Do a walk-through of your attic on a humid day. Bring a flashlight and look for dark staining, wet-looking insulation, or condensation on nails and framing.
How We Assess Your Home’s Mold Risk Before Installation
Our free assessment goes deeper than a generic quote. We evaluate multiple factors to determine your actual mold risk and the best prevention strategy:
Attic inspection — We look for existing mold, water damage, inadequate ventilation, and insulation condition. We photograph problem areas and explain what we’re seeing in real-time.
Humidity measurement — We use a hygrometer to check attic humidity during the humid season. Sustained humidity above 65 percent signals active moisture problems.
Air leak identification — We look for gaps around electrical penetrations, ductwork, ceiling fixtures, and rim joists. These are the primary pathways for humid air to escape into your attic.
Ventilation evaluation — We check whether soffit and ridge vents are properly sized, unblocked, and functioning. Poor ventilation allows moisture to accumulate even with sealed insulation.
HVAC assessment — We evaluate your existing ductwork, looking for leaks, disconnections, or mold growth. We’ll recommend duct sealing or cleaning if needed.
Local factors — We consider your home’s age, roof type, and location within Austin or San Antonio. Newer construction in certain areas faces different moisture challenges than older homes.
Based on this assessment, we recommend a specific insulation type (cellulose vs. fiberglass), R-value, and any additional work like duct cleaning or attic ventilation upgrades. Our goal is a comprehensive plan that actually solves your mold risk, not just a generic insulation job.
Action step: Request our free mold risk assessment. We’ll provide a detailed report with photos and a clear explanation of what needs to happen.
The Long-Term Benefits of Proper Blow-In Insulation
Beyond mold prevention, proper blow-in insulation delivers ongoing benefits that compound over years:
Energy savings — Homes with adequate attic insulation reduce cooling costs by 20 to 30 percent in Texas. Over 10 years, that’s thousands of dollars back in your pocket. Savings grow as energy costs rise.
Consistent comfort — Even temperatures throughout your home mean no drafty rooms or hot spots. Your HVAC system cycles less frequently, reducing wear and extending equipment life.
Reduced HVAC strain — Your air conditioner doesn’t work overtime pulling humid air from unconditioned spaces. This extends compressor life and reduces repair costs.
Better indoor air quality — With moisture controlled and ductwork clean, mold spores, dust mites, and allergens decline noticeably. Respiratory health improves, especially for children and elderly family members.
Higher home value — Proper insulation is a tangible upgrade buyers want. You’ll recoup much of your investment when you sell, and it’s a major selling point in a competitive Texas market.
Pest and rodent resistance — Borate-treated cellulose resists insects and rodents far better than fiberglass. Once you’ve invested in new insulation, you want it to stay clean and pest-free for decades.
Peace of mind — You’re no longer wondering if mold is growing in your attic or if moisture is damaging your home’s structure. Professional installation with warranties gives you confidence.
Most homeowners see payback within 5 to 7 years through energy savings alone. Add in avoided mold remediation costs, avoided health issues, and extended equipment life, and the investment becomes even more compelling.
Action step: Calculate your potential savings. If your cooling bill is $200 monthly in summer and you save 25 percent, that’s $50 monthly or $600 yearly. Over 10 years, that’s $6,000—often more than the installation cost.
Getting Your Free Insulation and Mold Prevention Estimate Today
If you’ve recognized any warning signs in your home, the next step is a professional assessment. We provide free, comprehensive estimates that include a detailed inspection, mold risk evaluation, photos of your current attic condition, and a clear breakdown of recommended work.
Our process is straightforward. You call us or request an estimate online. We schedule a convenient time to visit your Austin or San Antonio home. Our certified technician inspects your attic, checks humidity and air leaks, and discusses any concerns you have. Within 24 hours, we provide a detailed written estimate with pricing, timeline, and a clear explanation of what we’ll do and why.
We also discuss how insulation upgrades pair with other services like air duct cleaning and whether bundled HVAC packages might offer better value for your situation.
Questions to ask us during your estimate:
- What type of insulation do you recommend, and why?
- How do you air seal, and what specific gaps will you address?
- What R-value are you recommending, and what does it cost?
- Do you offer warranties on the work?
- Can we combine this with duct cleaning for savings?
Don’t let mold risk linger another season. Texas humidity waits for no one, and once mold takes hold, remediation becomes expensive and invasive. Proper blow-in insulation installed by certified professionals is your first line of defense.
Contact Go Air Ducts today for your free estimate. We’re ready to protect your home’s indoor air quality and give you the peace of mind that comes with professional mold prevention.
If you’re dealing with dust, poor airflow, mold in your ducts, or a clogged dryer vent — don’t wait. These issues can affect your health and safety. Go Air Ducts Group are the local experts in air duct cleaning, mold removal, dryer vent cleaning, and attic insulation. Call now for a free inspection and same-day service in Austin and San Antonio.
Frequently Asked Questions (FAQ)
How does blow-in insulation help prevent mold in my attic?
We install blow-in insulation to create a thermal barrier that reduces temperature fluctuations and moisture condensation in your attic. By maintaining more consistent temperatures and allowing proper air circulation, our insulation minimizes the conditions where mold thrives. We’ve found this approach particularly effective in Texas’s humid climate, where moisture control is essential for long-term mold prevention.
What signs indicate my current insulation is failing to protect against mold?
We recommend having your insulation inspected if you notice visible mold spots on attic framing, musty odors in your home, higher energy bills, or cold spots on your ceiling during winter. These are clear indicators that your insulation isn’t providing adequate moisture control or thermal protection. Our technicians can assess whether your existing insulation needs replacement or supplementation with our blow-in solutions.
Can air duct cleaning work together with insulation upgrades to improve my home’s air quality?
We absolutely recommend combining these services because they address different but complementary problems. While our blow-in insulation prevents mold growth at the source by controlling moisture and temperature, our air duct cleaning removes any existing contaminants, dust, and mold spores already circulating through your HVAC system. Together, these upgrades create a comprehensive defense against poor indoor air quality and help you breathe easier throughout your home.