
🕑 7 min read
The short flexible hose behind your dryer is easy to forget, and it takes more abuse than almost any other part of the venting system. It gets pushed against the wall, crushed under the machine, and loaded with lint every cycle. Knowing when it has reached the end of its useful life helps keep drying times short and the laundry area safer.
Quick Answer
Replace your dryer hose when it is crushed, kinked, torn, brittle, discolored from heat, disconnected, or made of thin plastic or foil that sags and traps lint. There is no fixed expiration date, so inspect it at least once a year and any time you move the dryer. Metal transition duct of the correct length is the usual replacement, and the dryer manual tells you what the manufacturer allows.
Key Takeaways
- The hose, often called the transition duct, connects the dryer to the wall vent and is the part most likely to get crushed or kinked.
- Visible damage, heat discoloration, or a sagging accordion shape are reasons to replace it, not to patch it with tape.
- A new hose does not fix a clogged vent line behind the wall. Check airflow at the outdoor hood as well.
- Use the shortest suitable length and follow the dryer manufacturer’s venting instructions.
What a Dryer Hose Does and Why It Fails
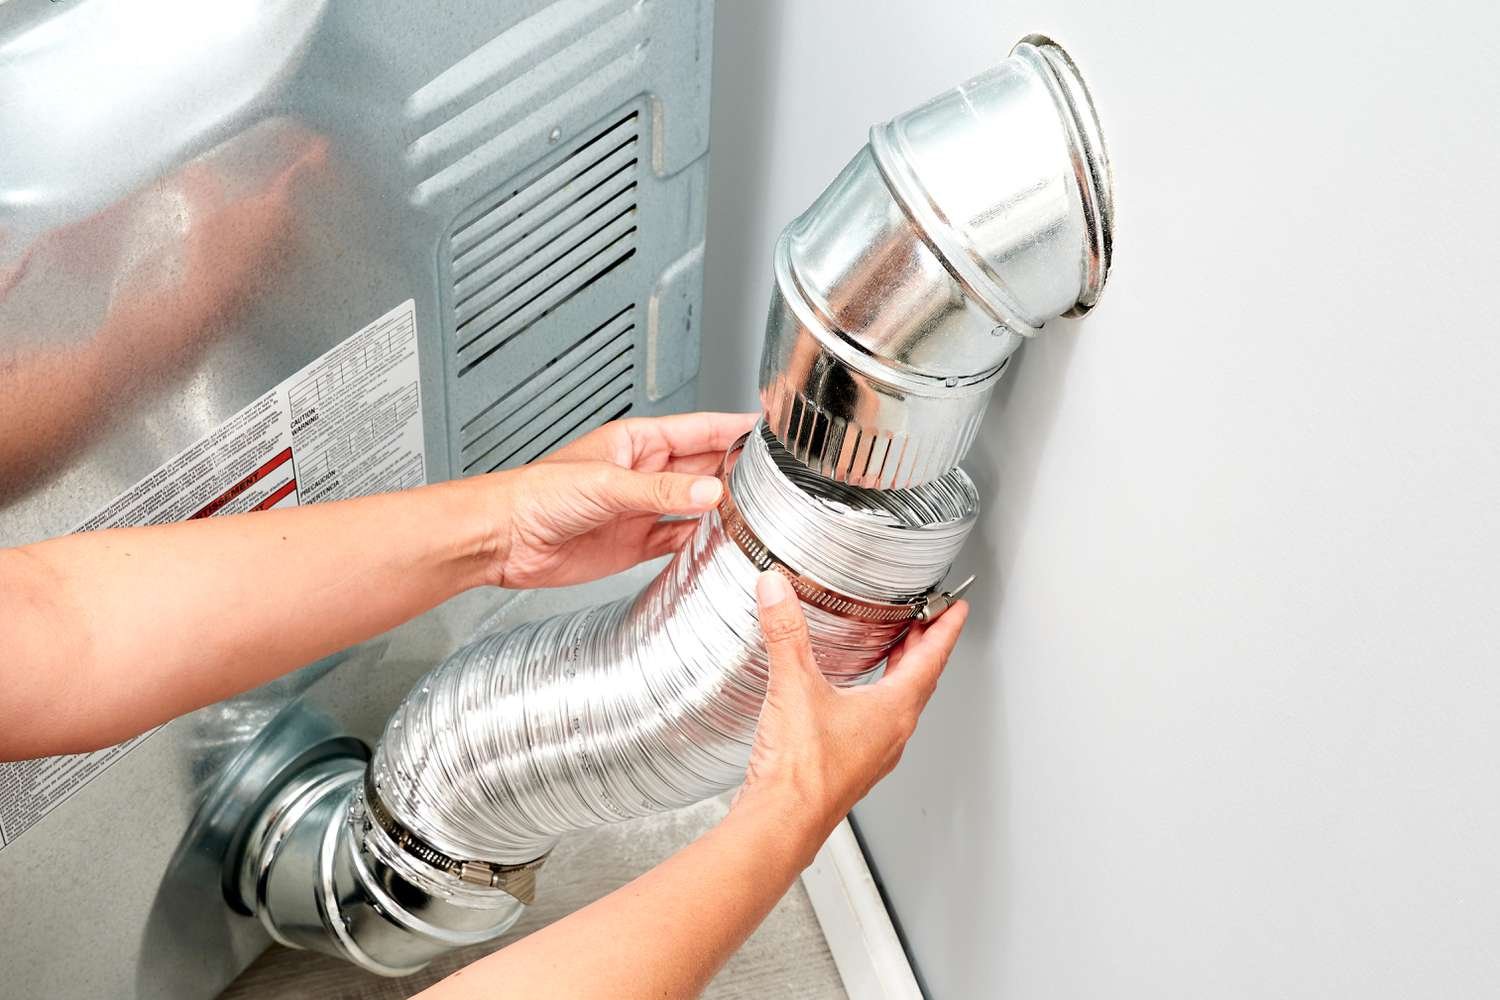
The hose, or transition duct, is the short connection between the back of the dryer and the vent opening in the wall. It has to flex enough to let the dryer move, which makes it vulnerable. Hot, moist air passes through it every load, and lint settles in any ridge or fold that slows airflow.
Damage tends to come from a few predictable situations: the dryer being pushed back tight against the wall, a hose that is longer than needed and gets folded, repeated heat cycling, and cheap thin materials that deform easily. Once the hose changes shape, airflow drops and lint collects faster, which is why a bad hose often shows up as longer drying times.
Signs the Hose Is Ready to Go
| What You See | Why It Matters | Action |
|---|---|---|
| Crushed or kinked sections | Restricts airflow and collects lint | Replace, and leave more clearance behind the dryer |
| Tears, holes, or loose seams | Lets hot, lint-filled air escape into the room | Replace promptly; do not patch with tape |
| Brittle, discolored, or heat-damaged material | Shows the hose is breaking down from heat | Replace |
| Thin plastic or vinyl-style flexible duct | Can sag, trap lint, and deteriorate with heat | Replace with appropriate metal duct |
| Loose or missing clamps | Allows disconnection and air leaks | Reconnect or replace with proper clamps |
| Heavy lint packed in ridges | Reduces airflow | Clean or replace, then check the vent behind it |
Materials: What to Look For and What to Avoid
Metal is the safer choice for dryer venting. Fire-safety guidance, including the National Fire Protection Association’s clothes dryer and washing machine safety tips (hosted by the U.S. Department of Energy), recommends metal venting for proper airflow. Plastic and vinyl flexible ducts collapse more easily, retain lint, and are not what most dryer manufacturers specify.
| Hose Type | Typical Strengths | Typical Concerns |
|---|---|---|
| Rigid metal | Smooth interior and strong airflow | No flexibility, so it may not suit tight spaces |
| Semi-rigid metal | Some flexibility with a smoother interior than foil accordion | Needs to be installed without kinking |
| Thin foil accordion | Very flexible and inexpensive | Ridges trap lint, and the material can crush or tear |
| Plastic or vinyl | Cheap and easy to find | Can sag and deteriorate with heat, and is generally a poor choice for dryers |
Always check your dryer’s manual. It spells out acceptable materials, maximum length, and how many bends the manufacturer allows.
Is It Just the Hose, or the Whole Vent?
A new hose fixes a bad hose. It does not clear lint that has built up inside the vent pipe in the wall, attic, or crawlspace. If drying times are long or the dryer runs hot, run the dryer and check the outdoor flap for airflow. Our guide on signs your dryer vent needs immediate cleaning helps you decide, and the article on cleaning the dryer lint trap covers the part of the system you can handle every week.
Length matters too. A longer hose has more places to fold and more surface for lint. If you are not sure the overall run is appropriate, see how to tell if a dryer vent line is too long or has too many turns.
Not Sure What You Are Looking At Behind the Dryer?
Pulling a dryer out and inspecting the hose is easy enough for some homeowners and awkward for others, especially with gas dryers, tight laundry closets, or long runs. A professional inspection looks at the hose, the connection, the pipe behind the wall, and the outdoor termination together. Go Air Ducts provides dryer vent inspection in Austin, San Antonio, and Round Rock.
Schedule a Dryer Vent Inspection
A Safe Way to Check and Replace the Hose
- Turn the dryer off and unplug it. For a gas dryer, shut off the gas supply and do not move the machine if you are unsure how. Gas connections should be handled by a qualified professional.
- Pull the dryer out carefully. Avoid yanking on the hose or gas line.
- Inspect the hose. Look for crushing, tears, discoloration, heavy lint, and loose clamps.
- Disconnect and clean the opening. Clear lint from both the dryer outlet and the wall vent opening.
- Install the new hose with the shortest practical length. Secure it with proper clamps, avoid sharp bends, and leave space so the dryer does not crush it when pushed back.
- Test airflow. Run the dryer and confirm the outdoor flap opens with steady air.
Cleaning, Repair, or Replacement?
Match the service to the actual problem. Replacing a hose will not clear a full vent, and cleaning will not fix a damaged hose.
- Use dryer vent cleaning when lint has built up in an otherwise sound line. Go Air Ducts lists a promotional starting price of $99.99 for dryer vent cleaning, and the final price depends on the property and what is found.
- Choose dryer vent pipe repair when sections of the pipe behind the hose are damaged or disconnected.
- Consider dryer vent replacement when the line itself is unsuitable or badly routed.
A common source of trouble outside the house is the termination. If the hood is blocked or the flap sticks, a new hose will not help. Our post on bird nests in dryer vents explains what that looks like.
Why the Texas Laundry Room Makes This Matter More
Many Central Texas laundry spaces are tucked into garages, closets, or interior rooms where heat has nowhere to go. A kinked or failing hose adds to that heat, and it does so quietly because the dryer keeps running. Heat-damaged material is a good reason to look at the hose even if drying times seem normal.
Frequently Asked Questions
How often should a dryer hose be replaced?
There is no fixed interval. Inspect it at least once a year and replace it when it is crushed, torn, brittle, discolored, or loose. Also check it any time the dryer is moved or after a remodel, since hoses are easily crushed when machines are pushed back into place.
What is the best material for a dryer hose?
Metal is the standard recommendation. Rigid or semi-rigid metal duct supports airflow better and holds up better to heat than plastic, vinyl, or thin foil accordion hoses. Check your dryer’s manual for the manufacturer’s accepted materials, maximum length, and bend limits before buying a replacement.
Can I use tape to repair a torn dryer hose?
Tape is not a lasting fix. A torn hose lets hot, lint-filled air escape, and tape can fail with heat. Replace the damaged section with a proper duct and use appropriate clamps. If the tear is part of a larger problem, have the full vent inspected.
Will a new hose fix long drying times?
Only if the old hose was the restriction. Lint buildup inside the vent pipe, a blocked outdoor hood, or a long run with many turns can cause the same symptoms. Check airflow at the outdoor flap, and have the vent line inspected if the new hose does not improve things.
Does Go Air Ducts inspect and replace dryer vent parts in Austin, San Antonio, and Round Rock?
Yes. Go Air Ducts offers dryer vent inspection, cleaning, repair, pipe repair, and replacement in Austin, San Antonio, and Round Rock. The team explains what it finds and the pricing before work begins. See the current service locations for details.
Make Sure the Whole Vent Is Doing Its Job
A good hose is only one piece of the venting system. If your dryer is slow, hot, or hard to push back, Go Air Ducts can look at the entire path from the dryer to the outdoors and recommend only what the system actually needs. Pricing is clear before any work begins.
Book Dryer Vent Service in Austin, San Antonio, or Round Rock